SupportAdd your email domain
Add your email domain
Sending email from your own domain is essential for maintaining a professional, trustworthy image with your audience.
Here's how to set up your own domain for sending email in EcoSend.
✅ Adding your own email domain
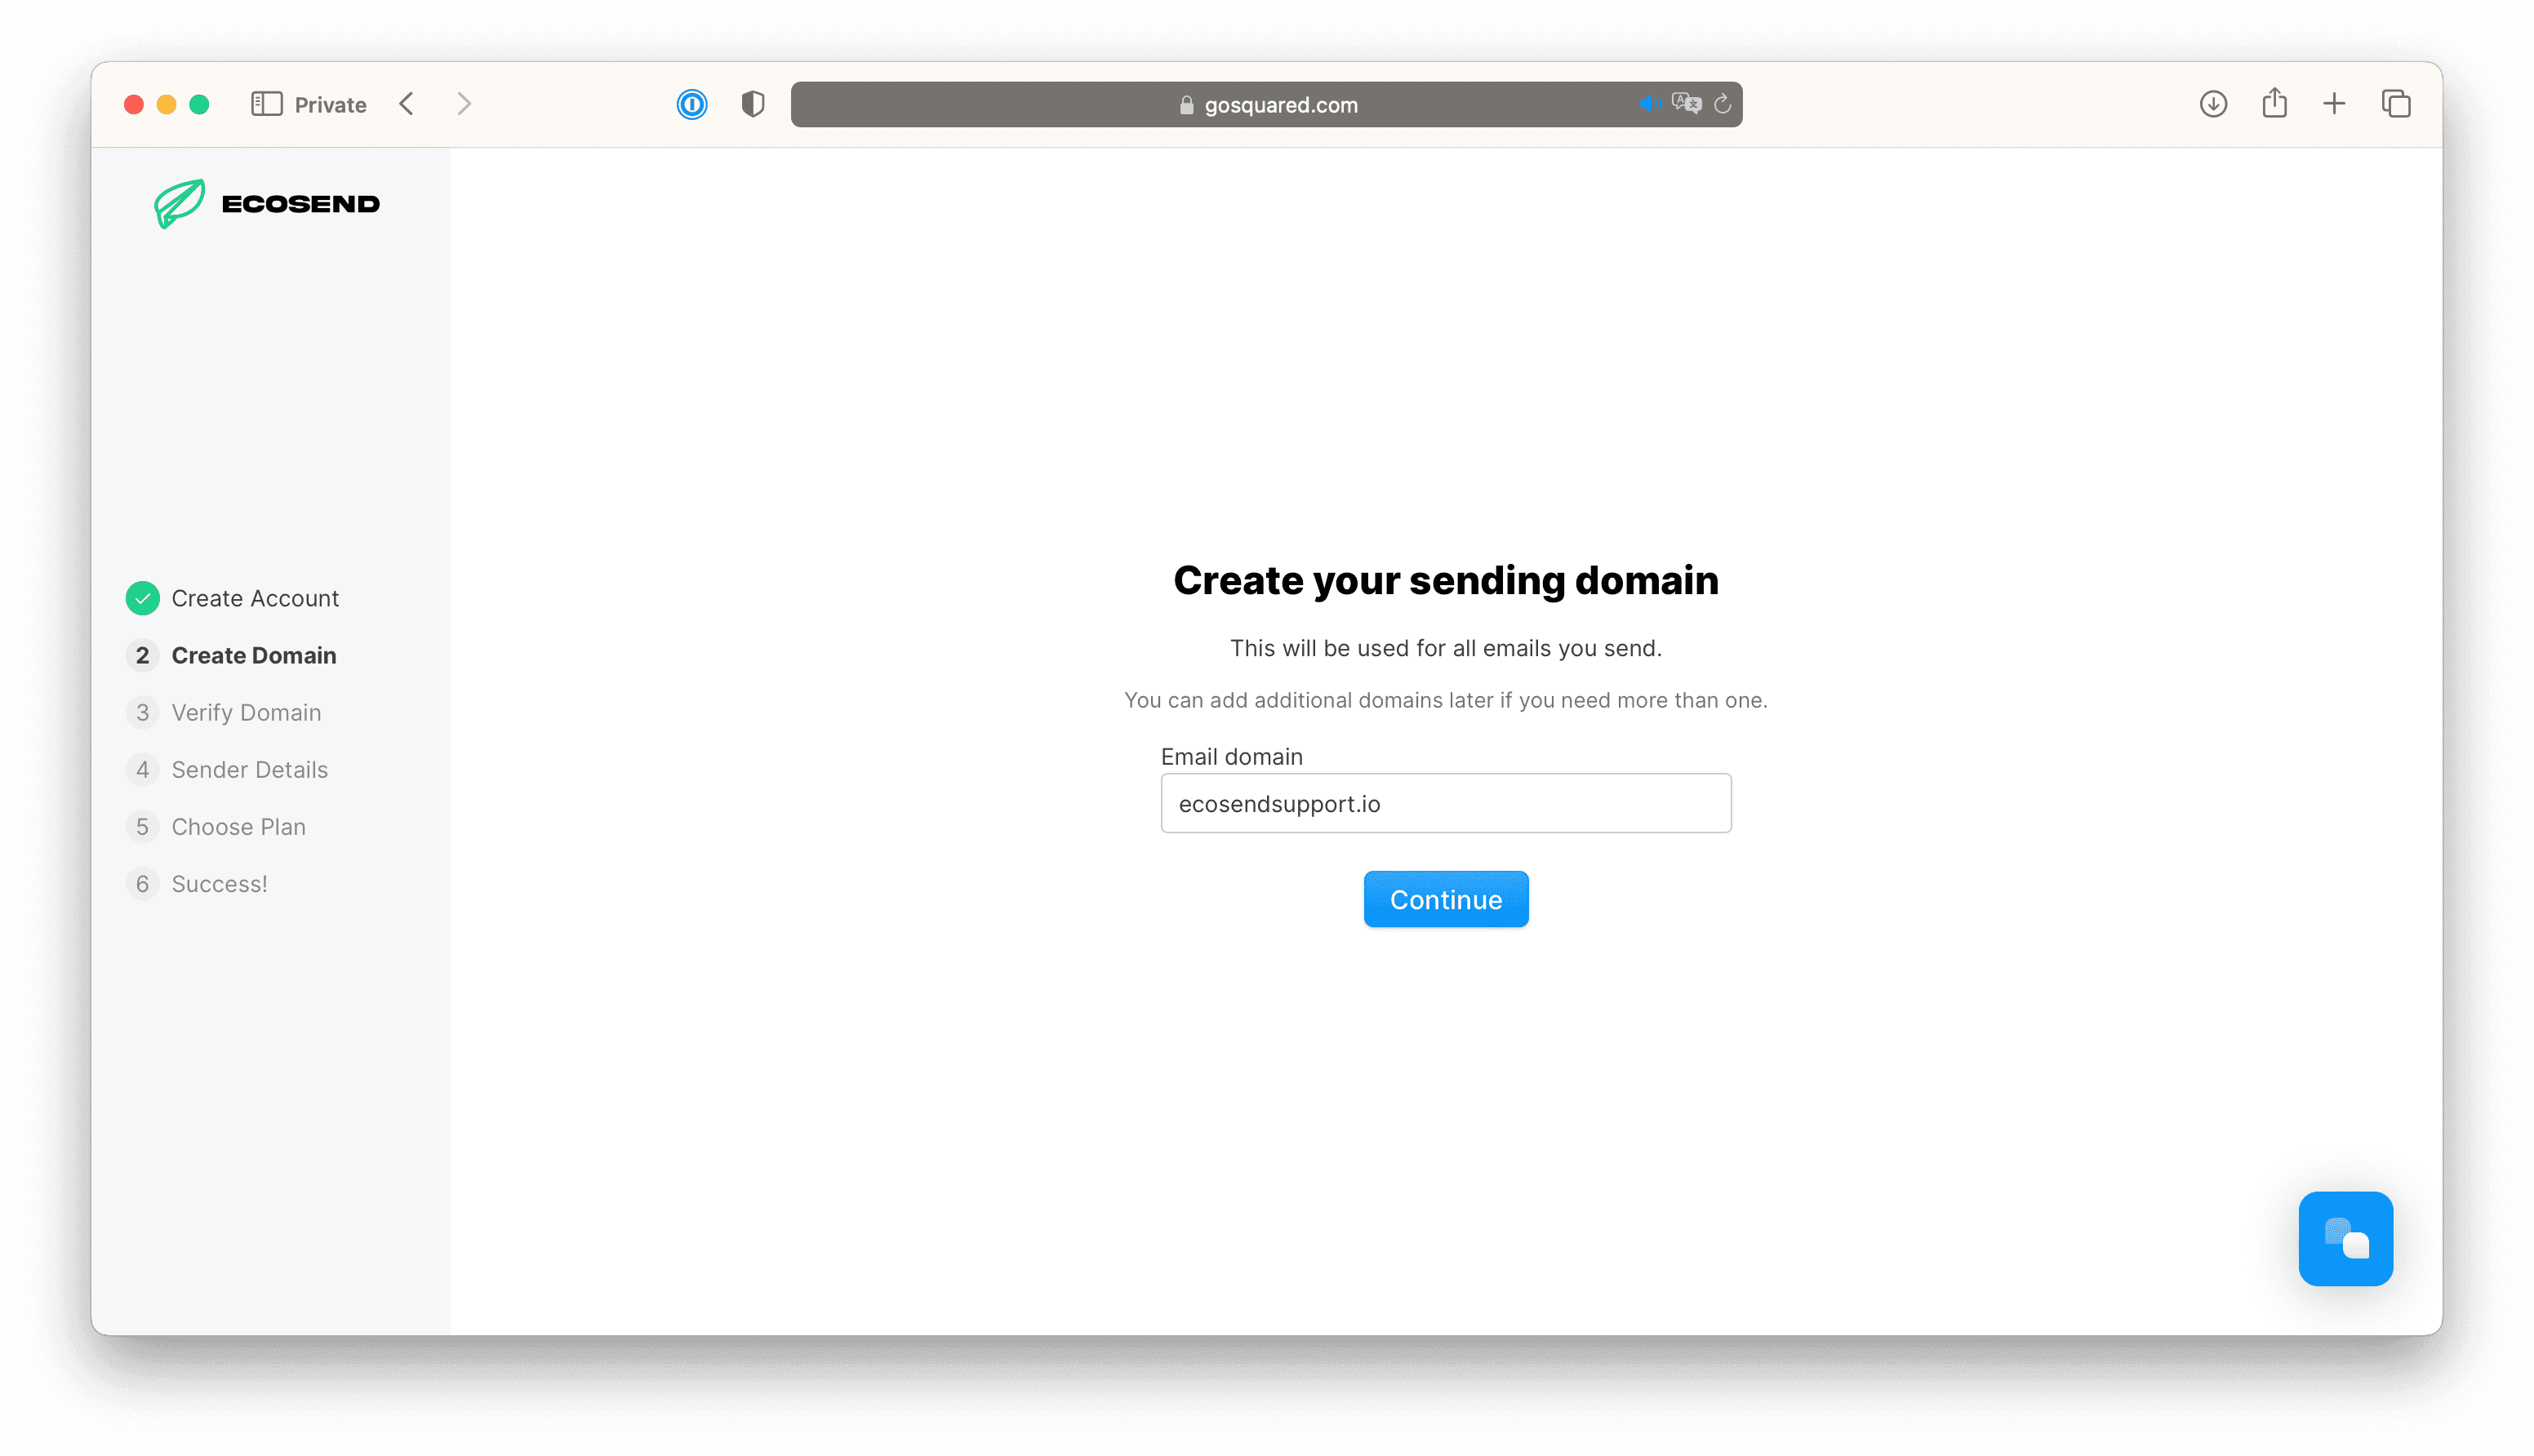
When you sign-up to EcoSend, you will first be asked to enter your sending domain.
Enter the domain name you wish to send email from (for example, to send email from chris@example.com, we'll add “example.com” as the domain name).
This will then generate DNS records in the following page, which you will need to input into your DNS provider.
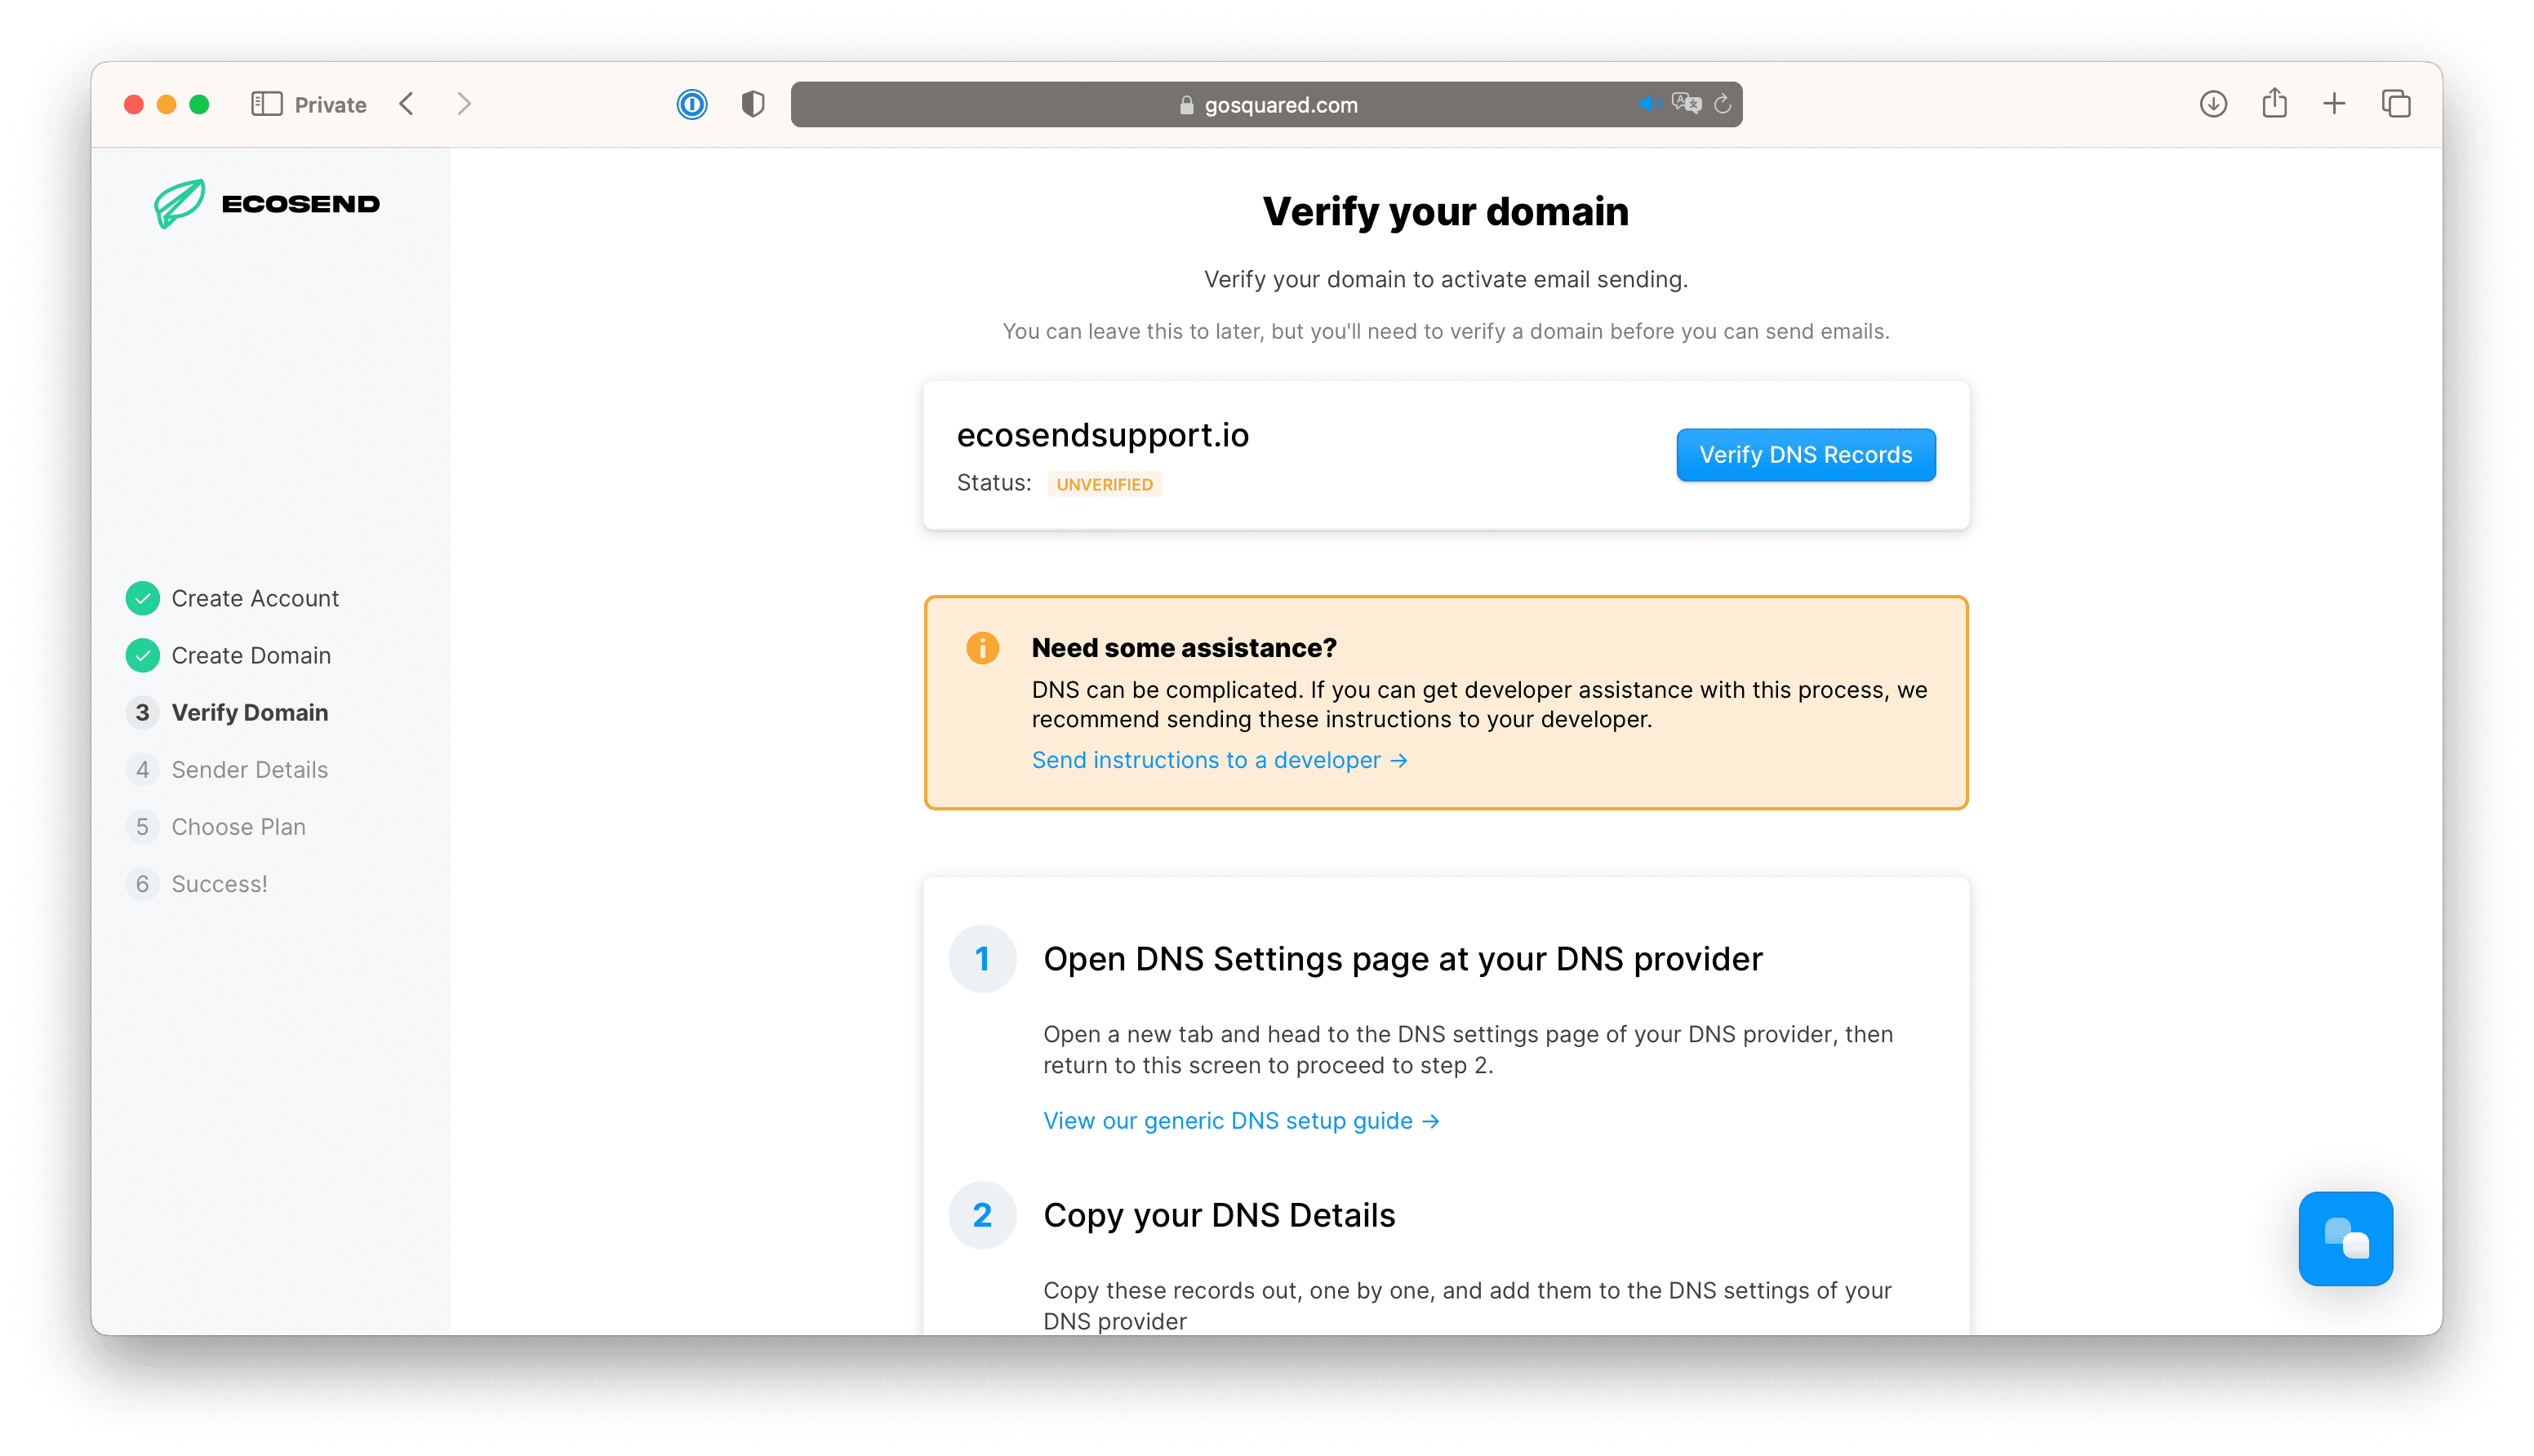
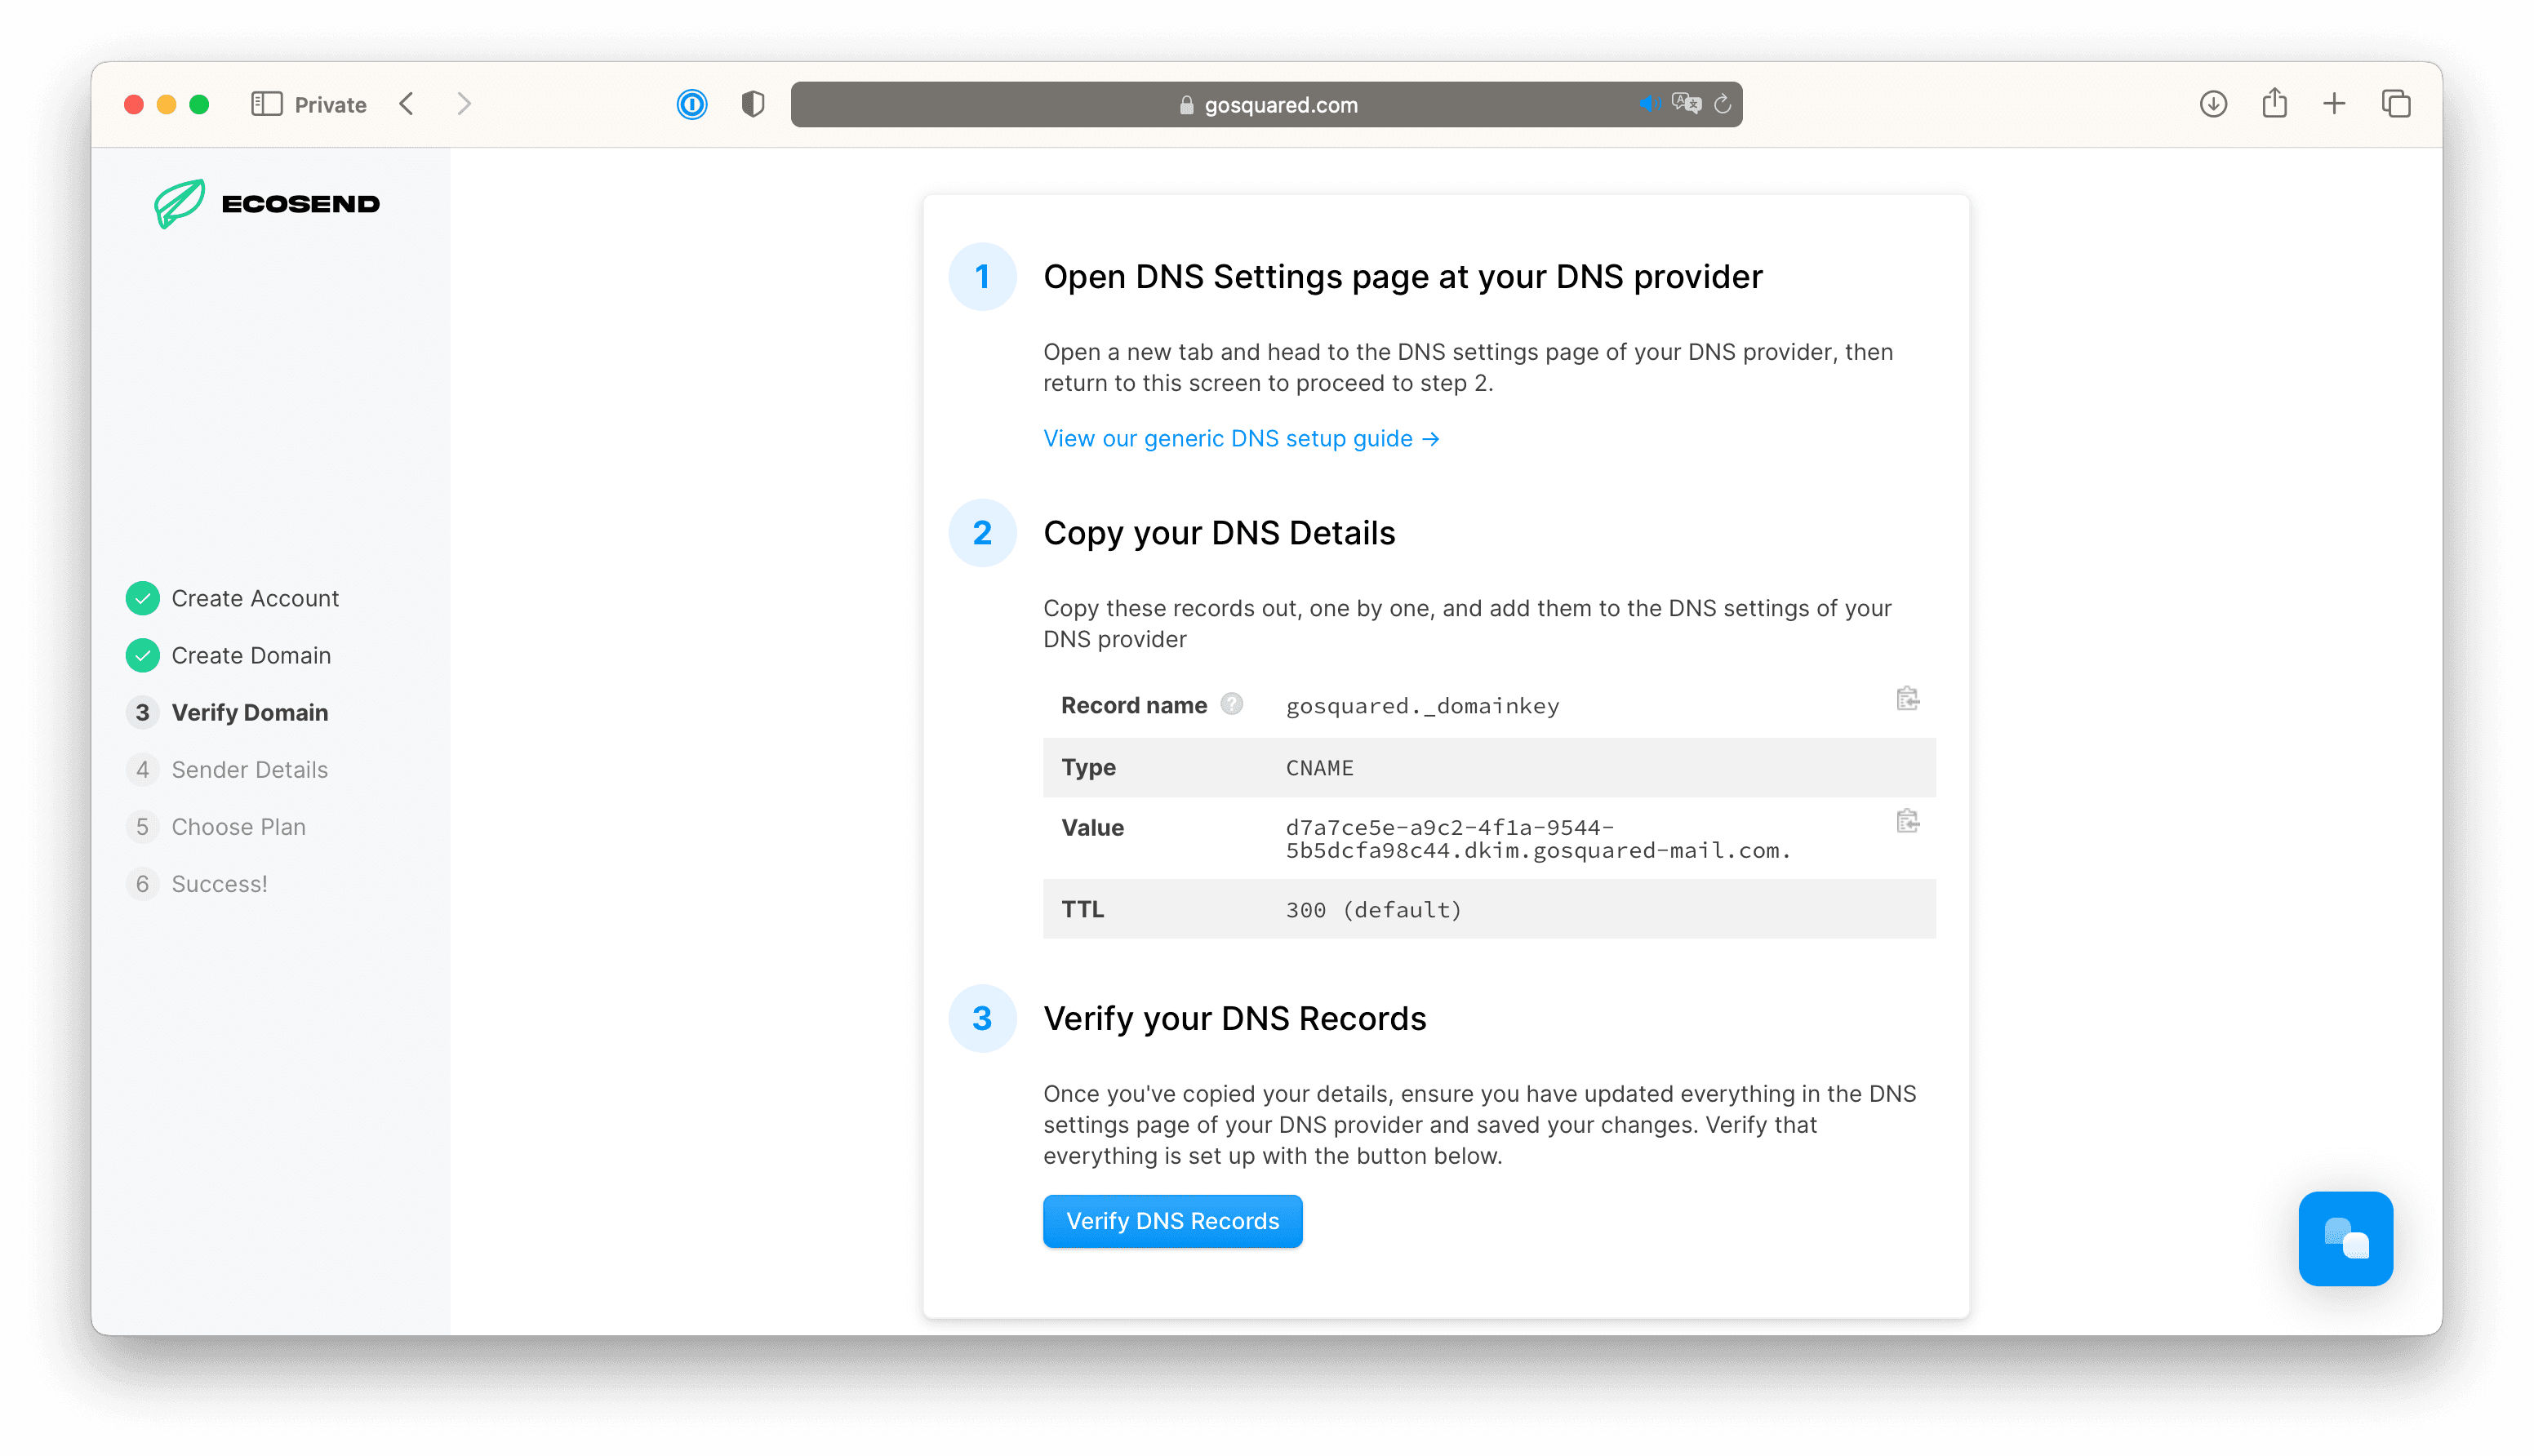
Head to your domain name provider and add a new CNAME record with the details shown on the Domain Verification screen.
👋 Scroll down in this article to see instructions for how to add a CNAME record in common domain name providers, or view our video walkthrough here.
Once you have updated your CNAME records in your domain name provider, head back to EcoSend and hit the “Verify DNS Records…” button to ensure the domain name has been verified.
Once verified, you’ll see a green badge with a check mark confirming that your domain has been verified.
The “Compliance Check” area will be pending until we’ve confirmed via a third party that your domain is compliant and ready to use.
Once you’ve passed the Compliance Check, your domain will now be ready to use!
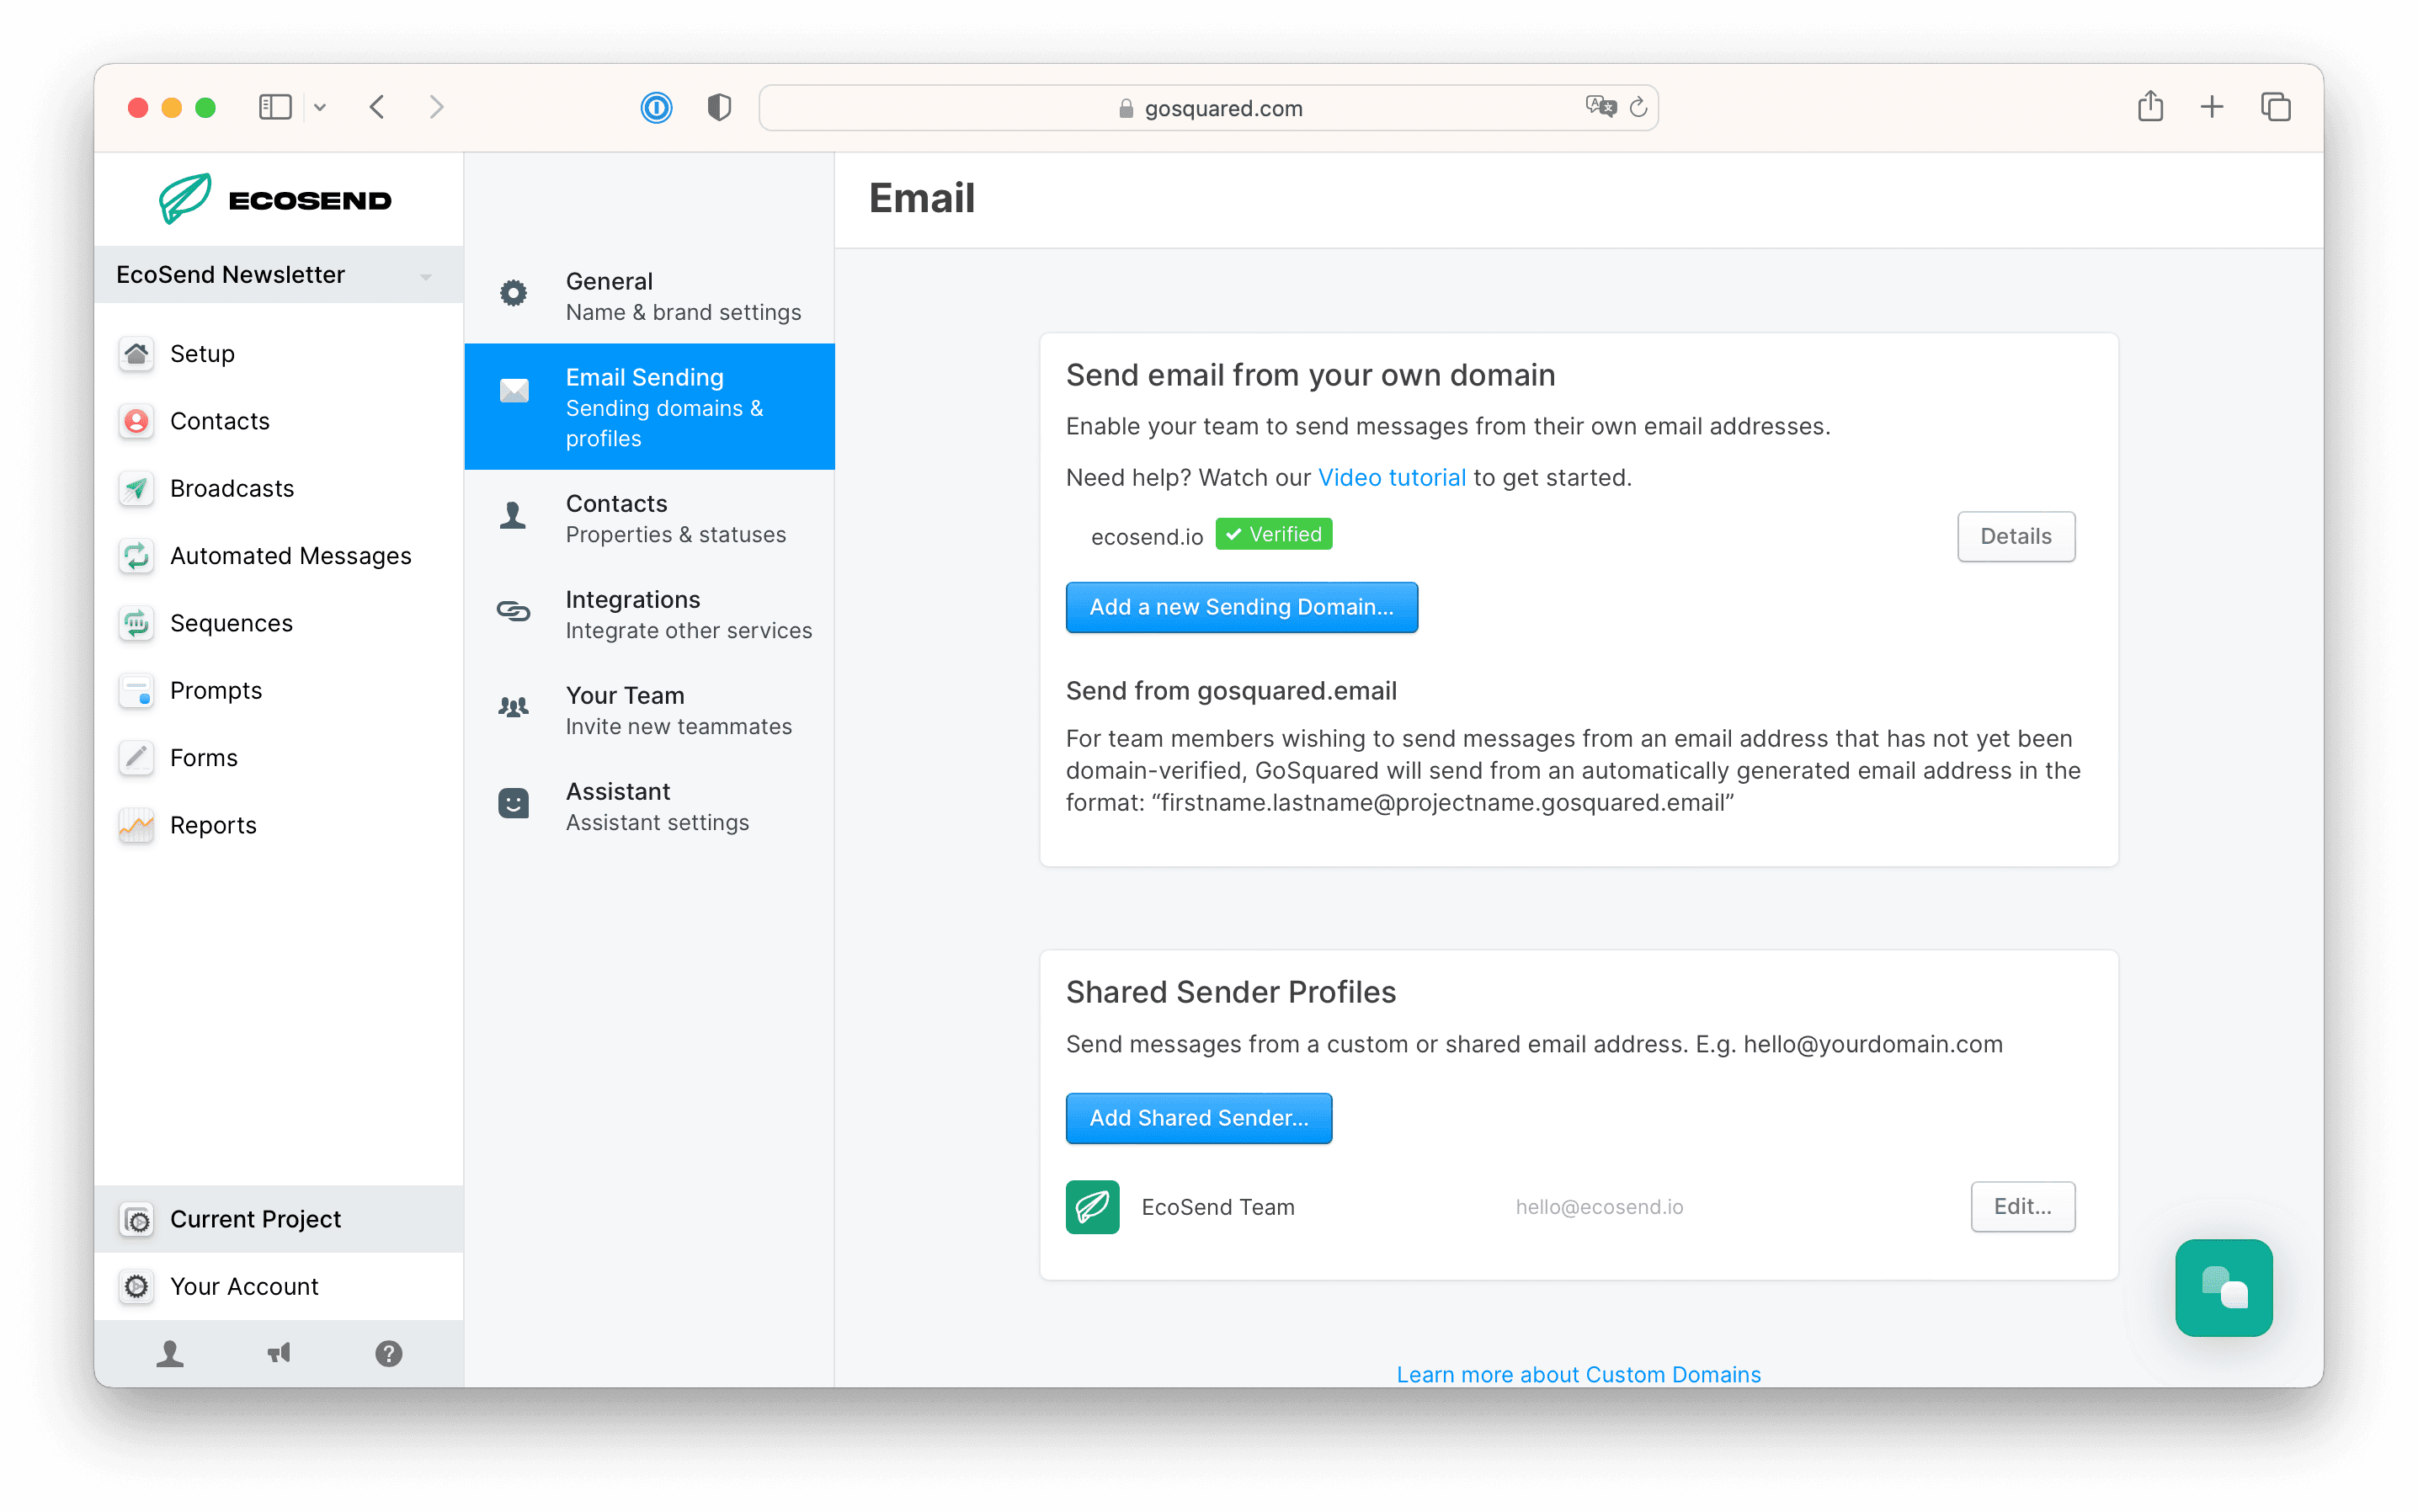
You can also head to Current Project > Domains to remove or add other email domains at any time.
💻 Editing your DNS records in common domain providers
If you purchased your domain through any of the following providers, here’s a handy link to their instructions on how to edit your DNS settings to add a new CNAME record.
- Amazon Web Services: Configuring Amazon Route 53 as Your DNS Service
- Dreamhost: DNS Overview
- GoDaddy: Add a CNAME Record
- Google Domains: DNS Basics
- Hostgator: Manage DNS records
- Hover: Edit DNS Records
- Namecheap: SPF & DKIM Records
- Squarespace: Advanced DNS Settings
- 1&1: DNS Settings
⏳ The DNS verification process
When you add an email sending domain, we give you a DNS record to place on your domain’s DNS records. The DNS record allows mail providers (such as Gmail) to verify that emails sent from GoSquared are allowed to use your domain in the “from” sender field.
Setting up the DNS
You will need to create a CNAME record in the DNS provider for your domain.
The record we give you is unique to your domain, and looks like this:
Type: CNAME
Hostname: gosquared.\_domainkey.your-domain.com
Value: 12345678-abcd-4123-1234-1234567890.dkim.gosquared-mail.com
Your DNS provider should give instructions on how to update your DNS records.
DNS verification
After your sending domain is added, we periodically check that the DNS records have been installed. We will normally detect this within an hour of your DNS settings being updated.
There are also additional compliance checks that may take a few hours to complete.
Once the DNS check and compliance checks have passed, your domain will be enabled for sending email.
📤 Update your Sender Profile
Once that your custom email domain has been verified, the final step is to update your Sender Profile to attach your email domain to your user login.
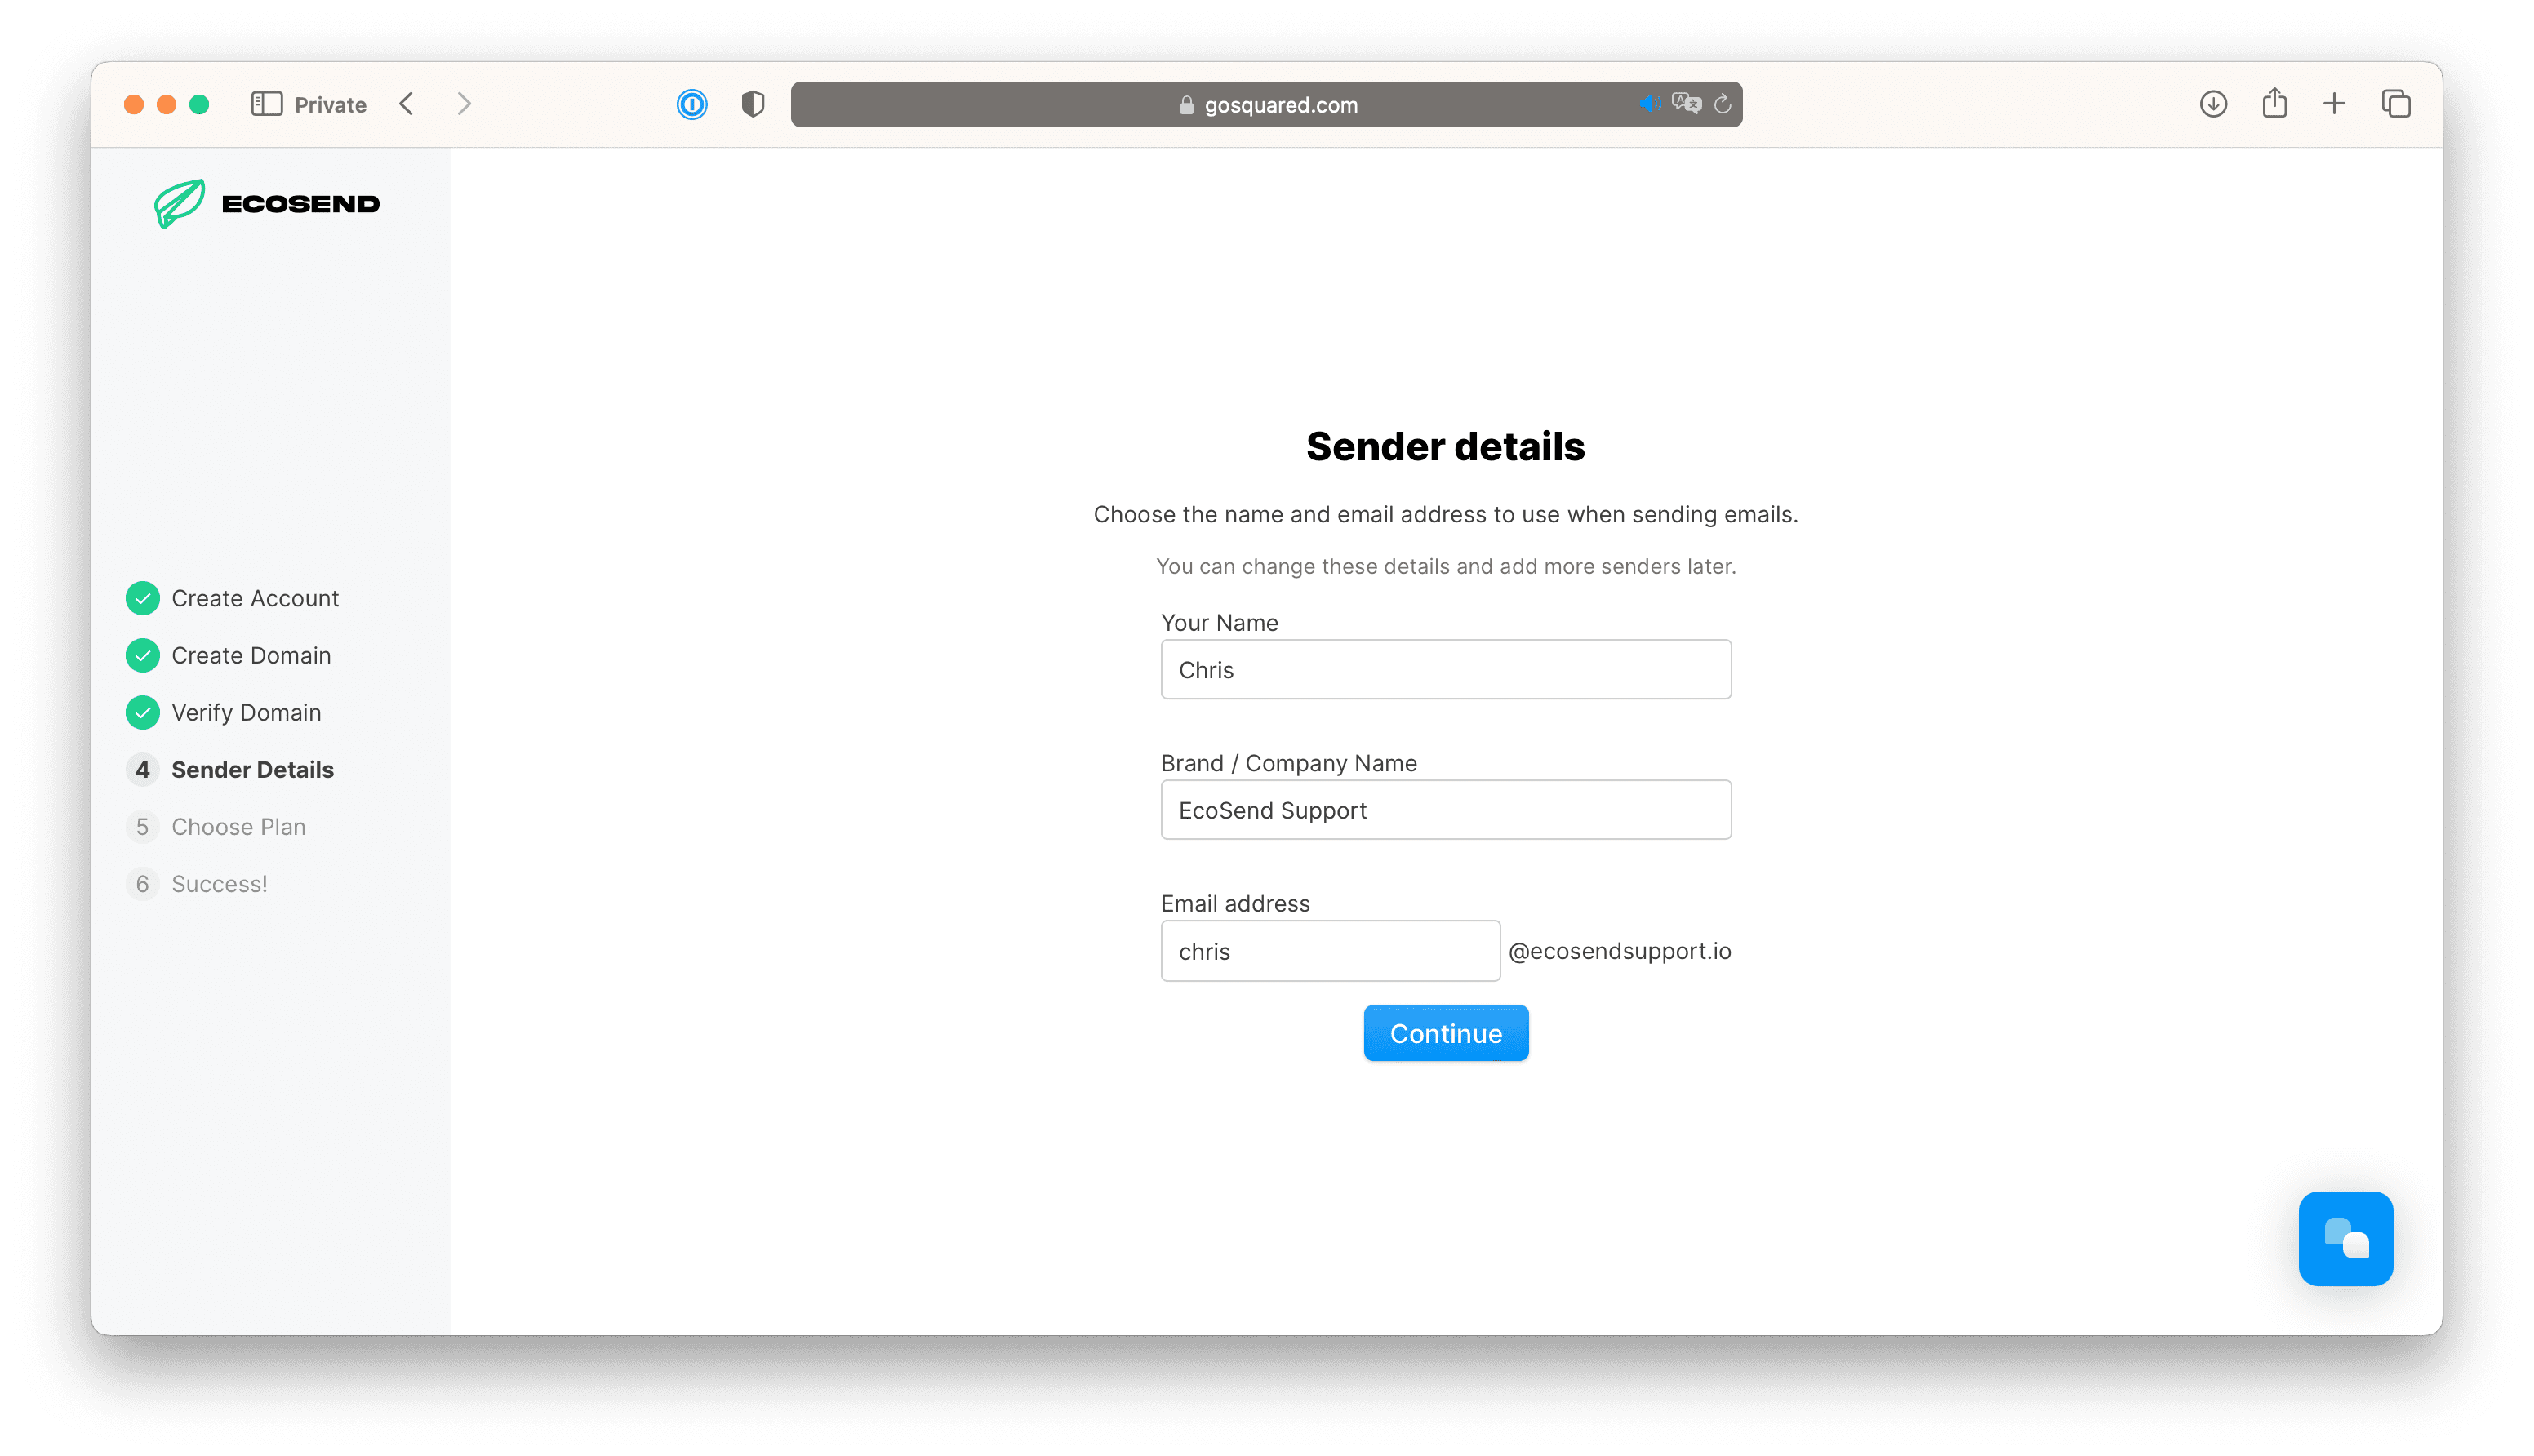
You can also head to Current Project > Your Team to find and edit your Sender Profiles anytime:
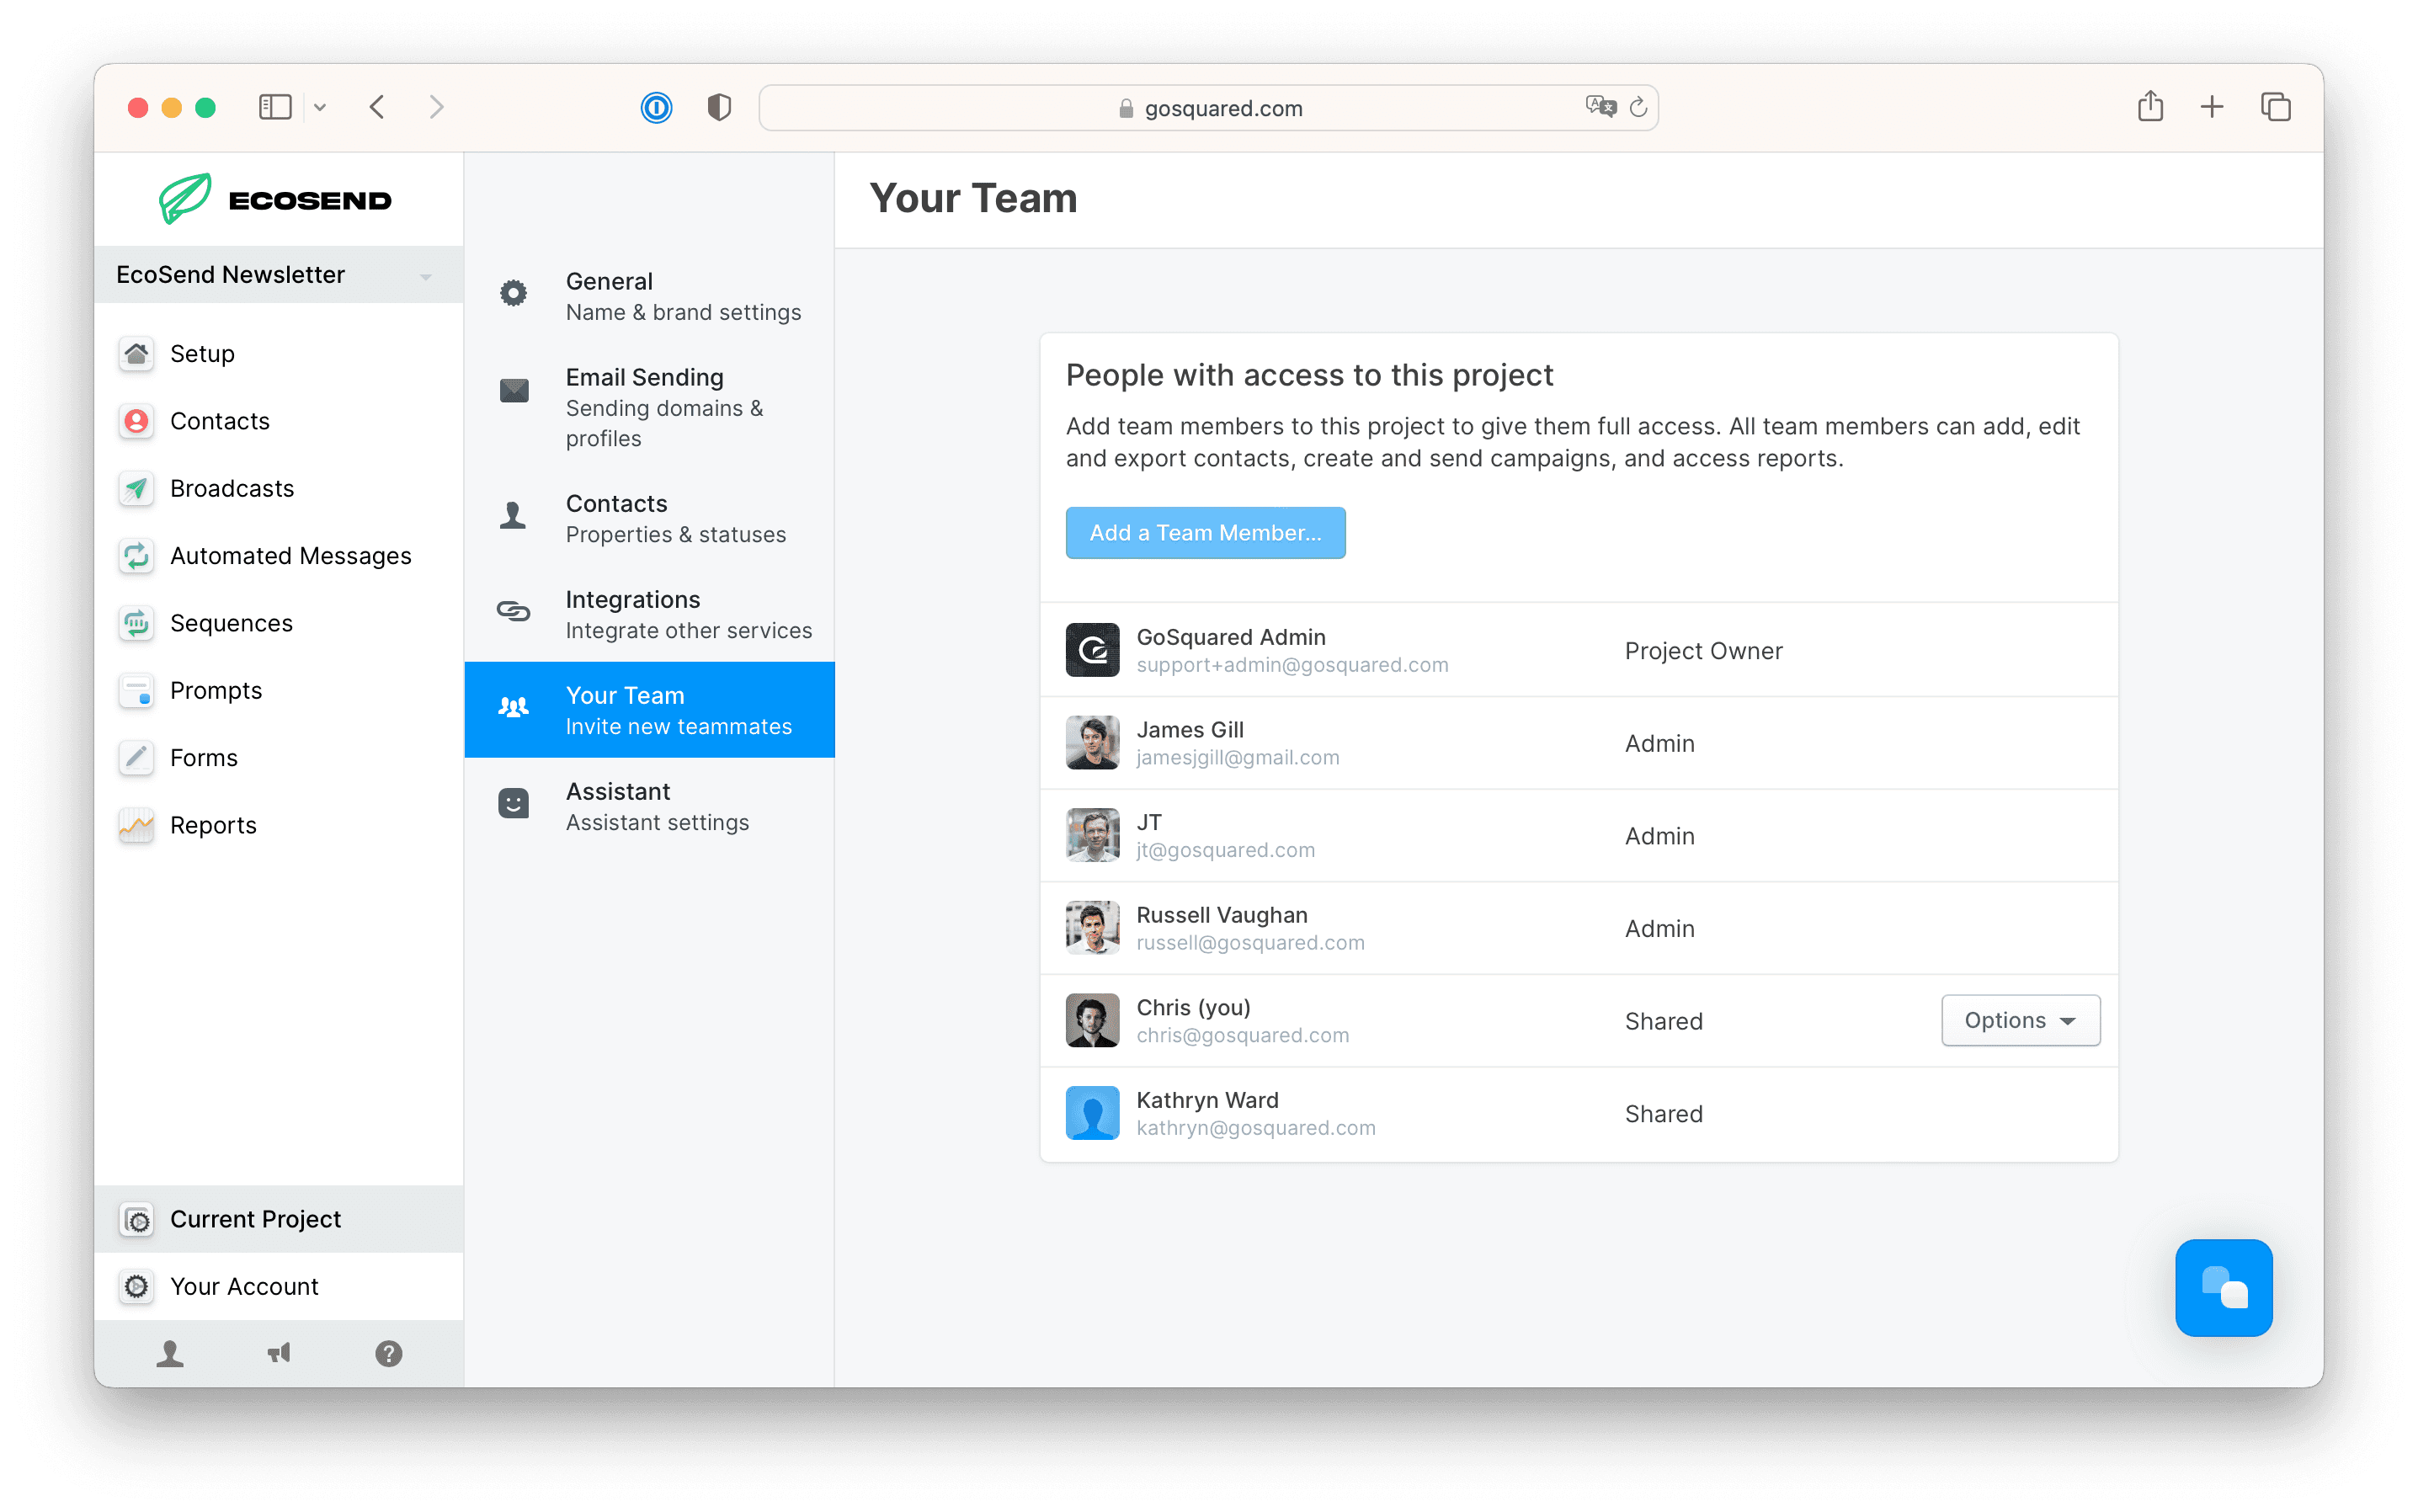
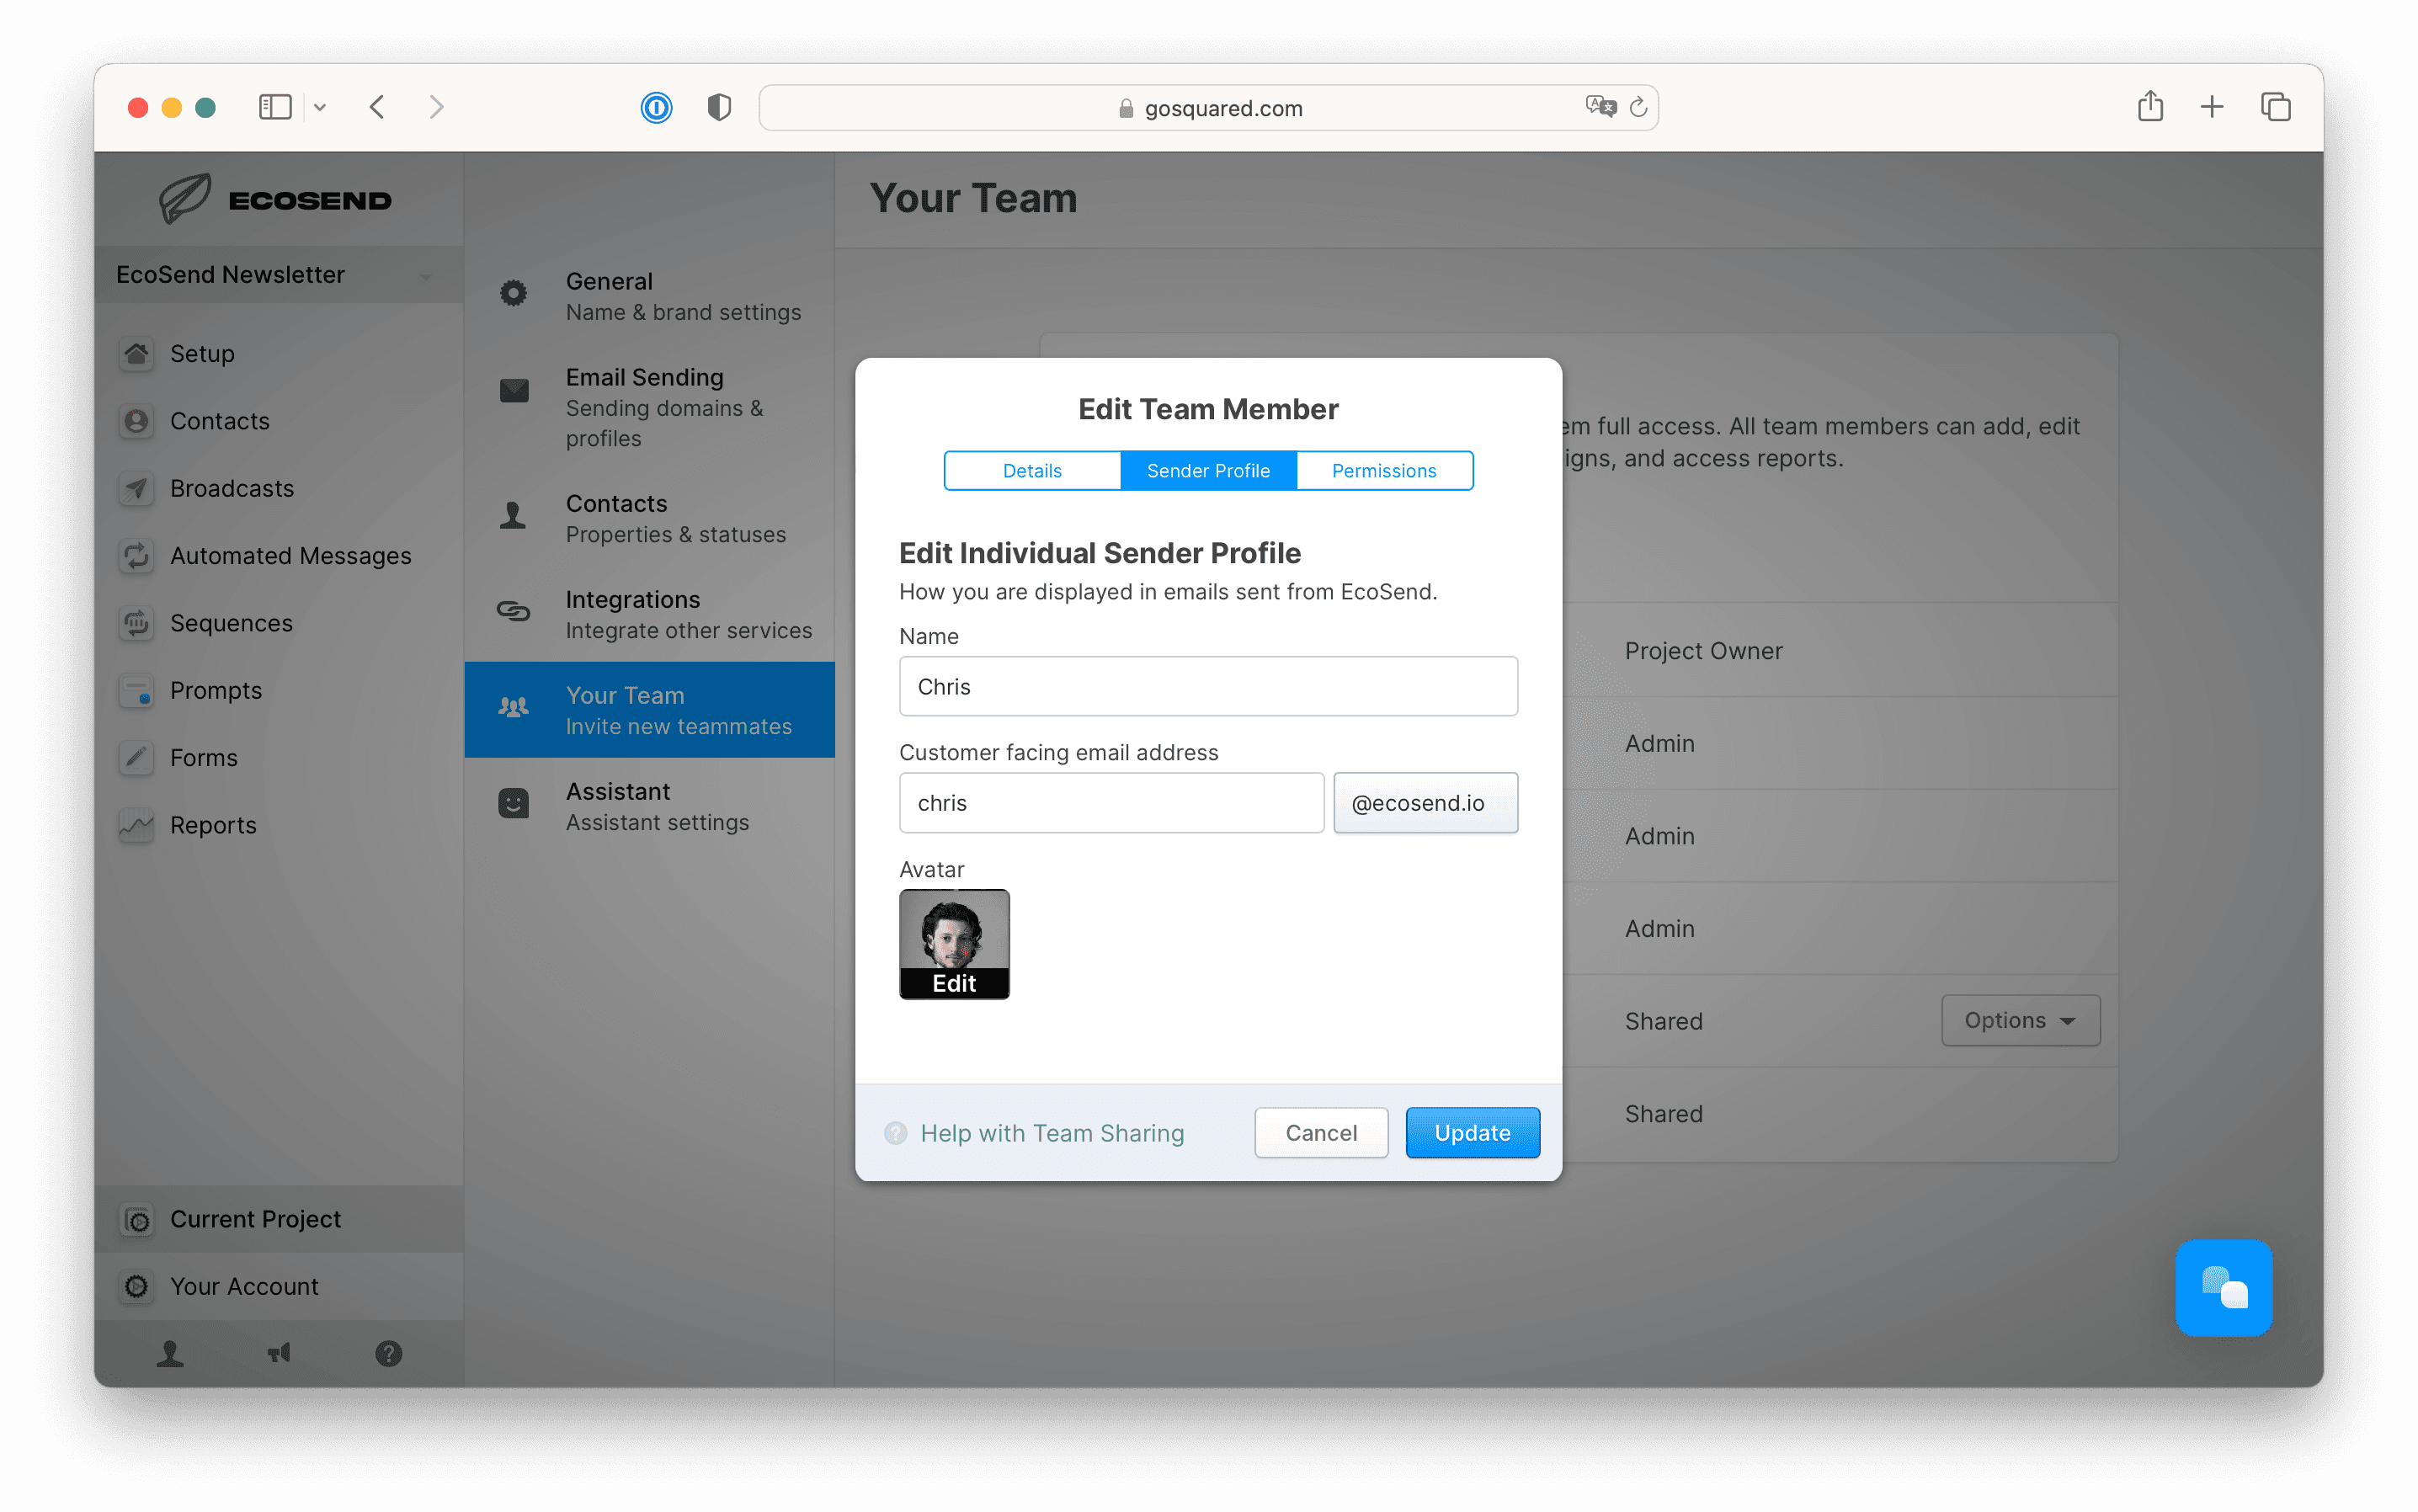
Under the Options dropdown, select Edit Team Member then navigate to the Sender Profile tab.
You can now set your own sender name and email address to display exactly as you want it to show to your subscribers.
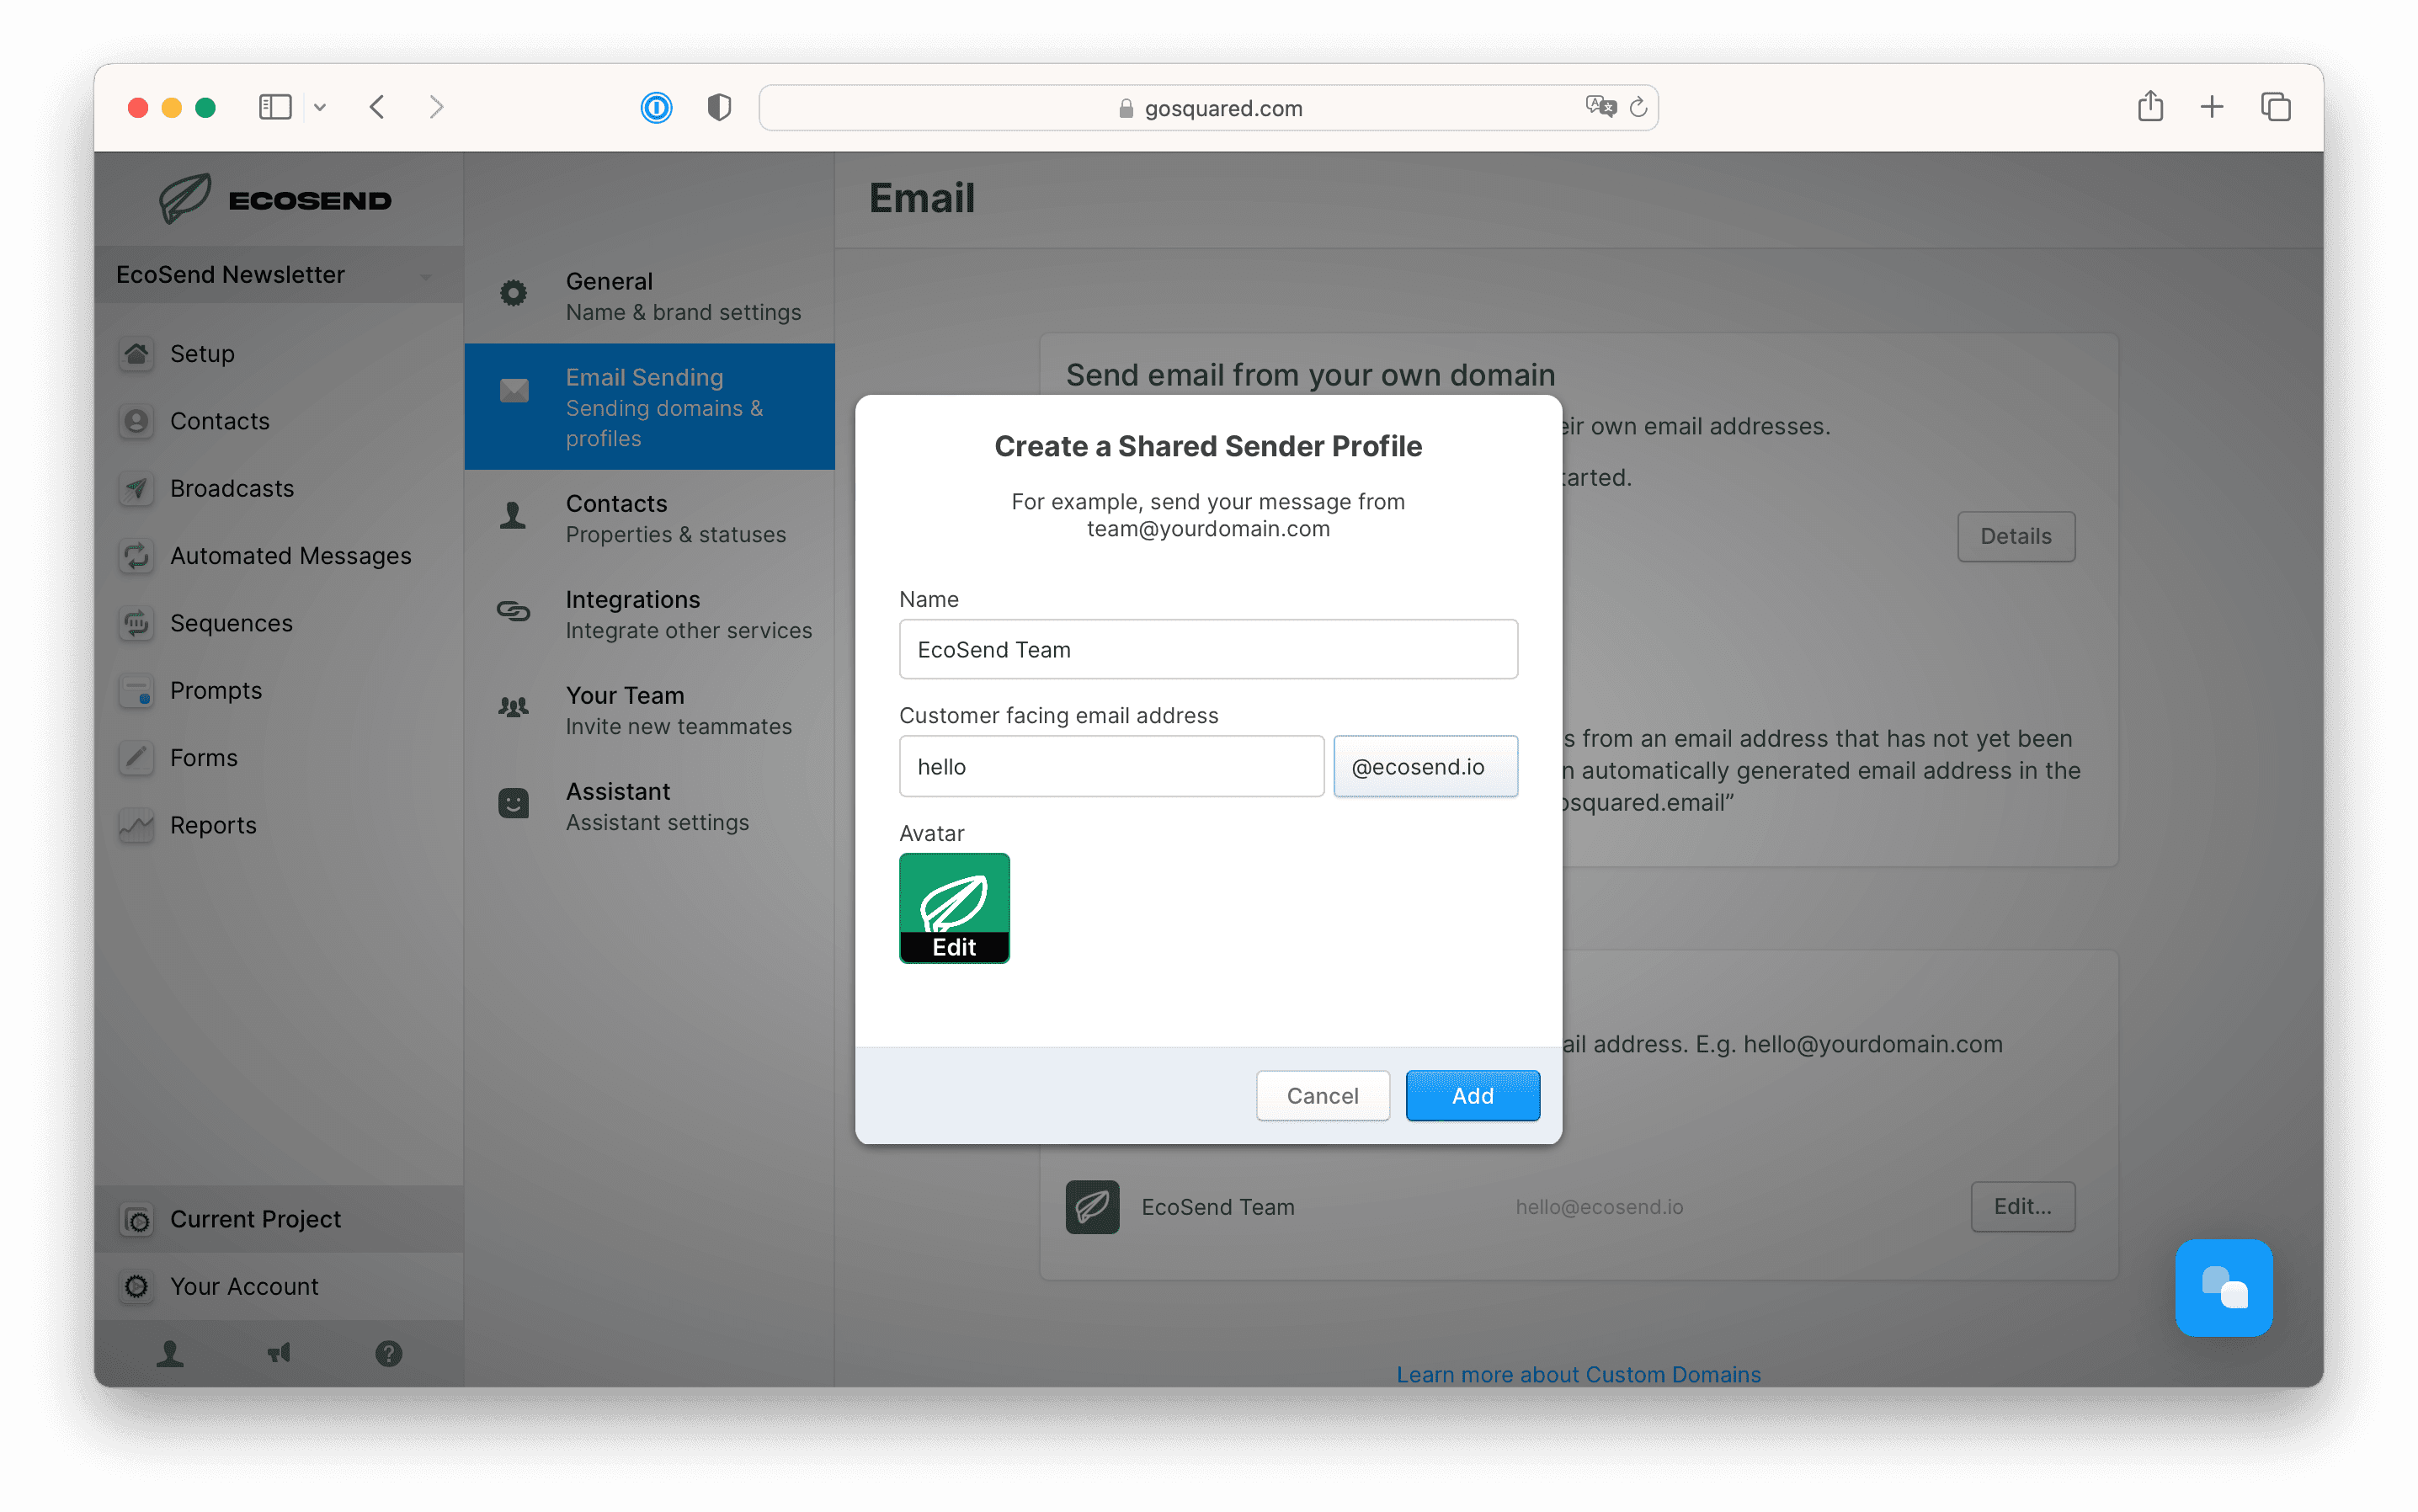
If you would like to send from a non-personal email address, such as "hello@example.com", head to Current Project > Your Team and hit "Add Shared Sender..." under "Shared Sender Profiles".
From here, you can add a shared team email address:
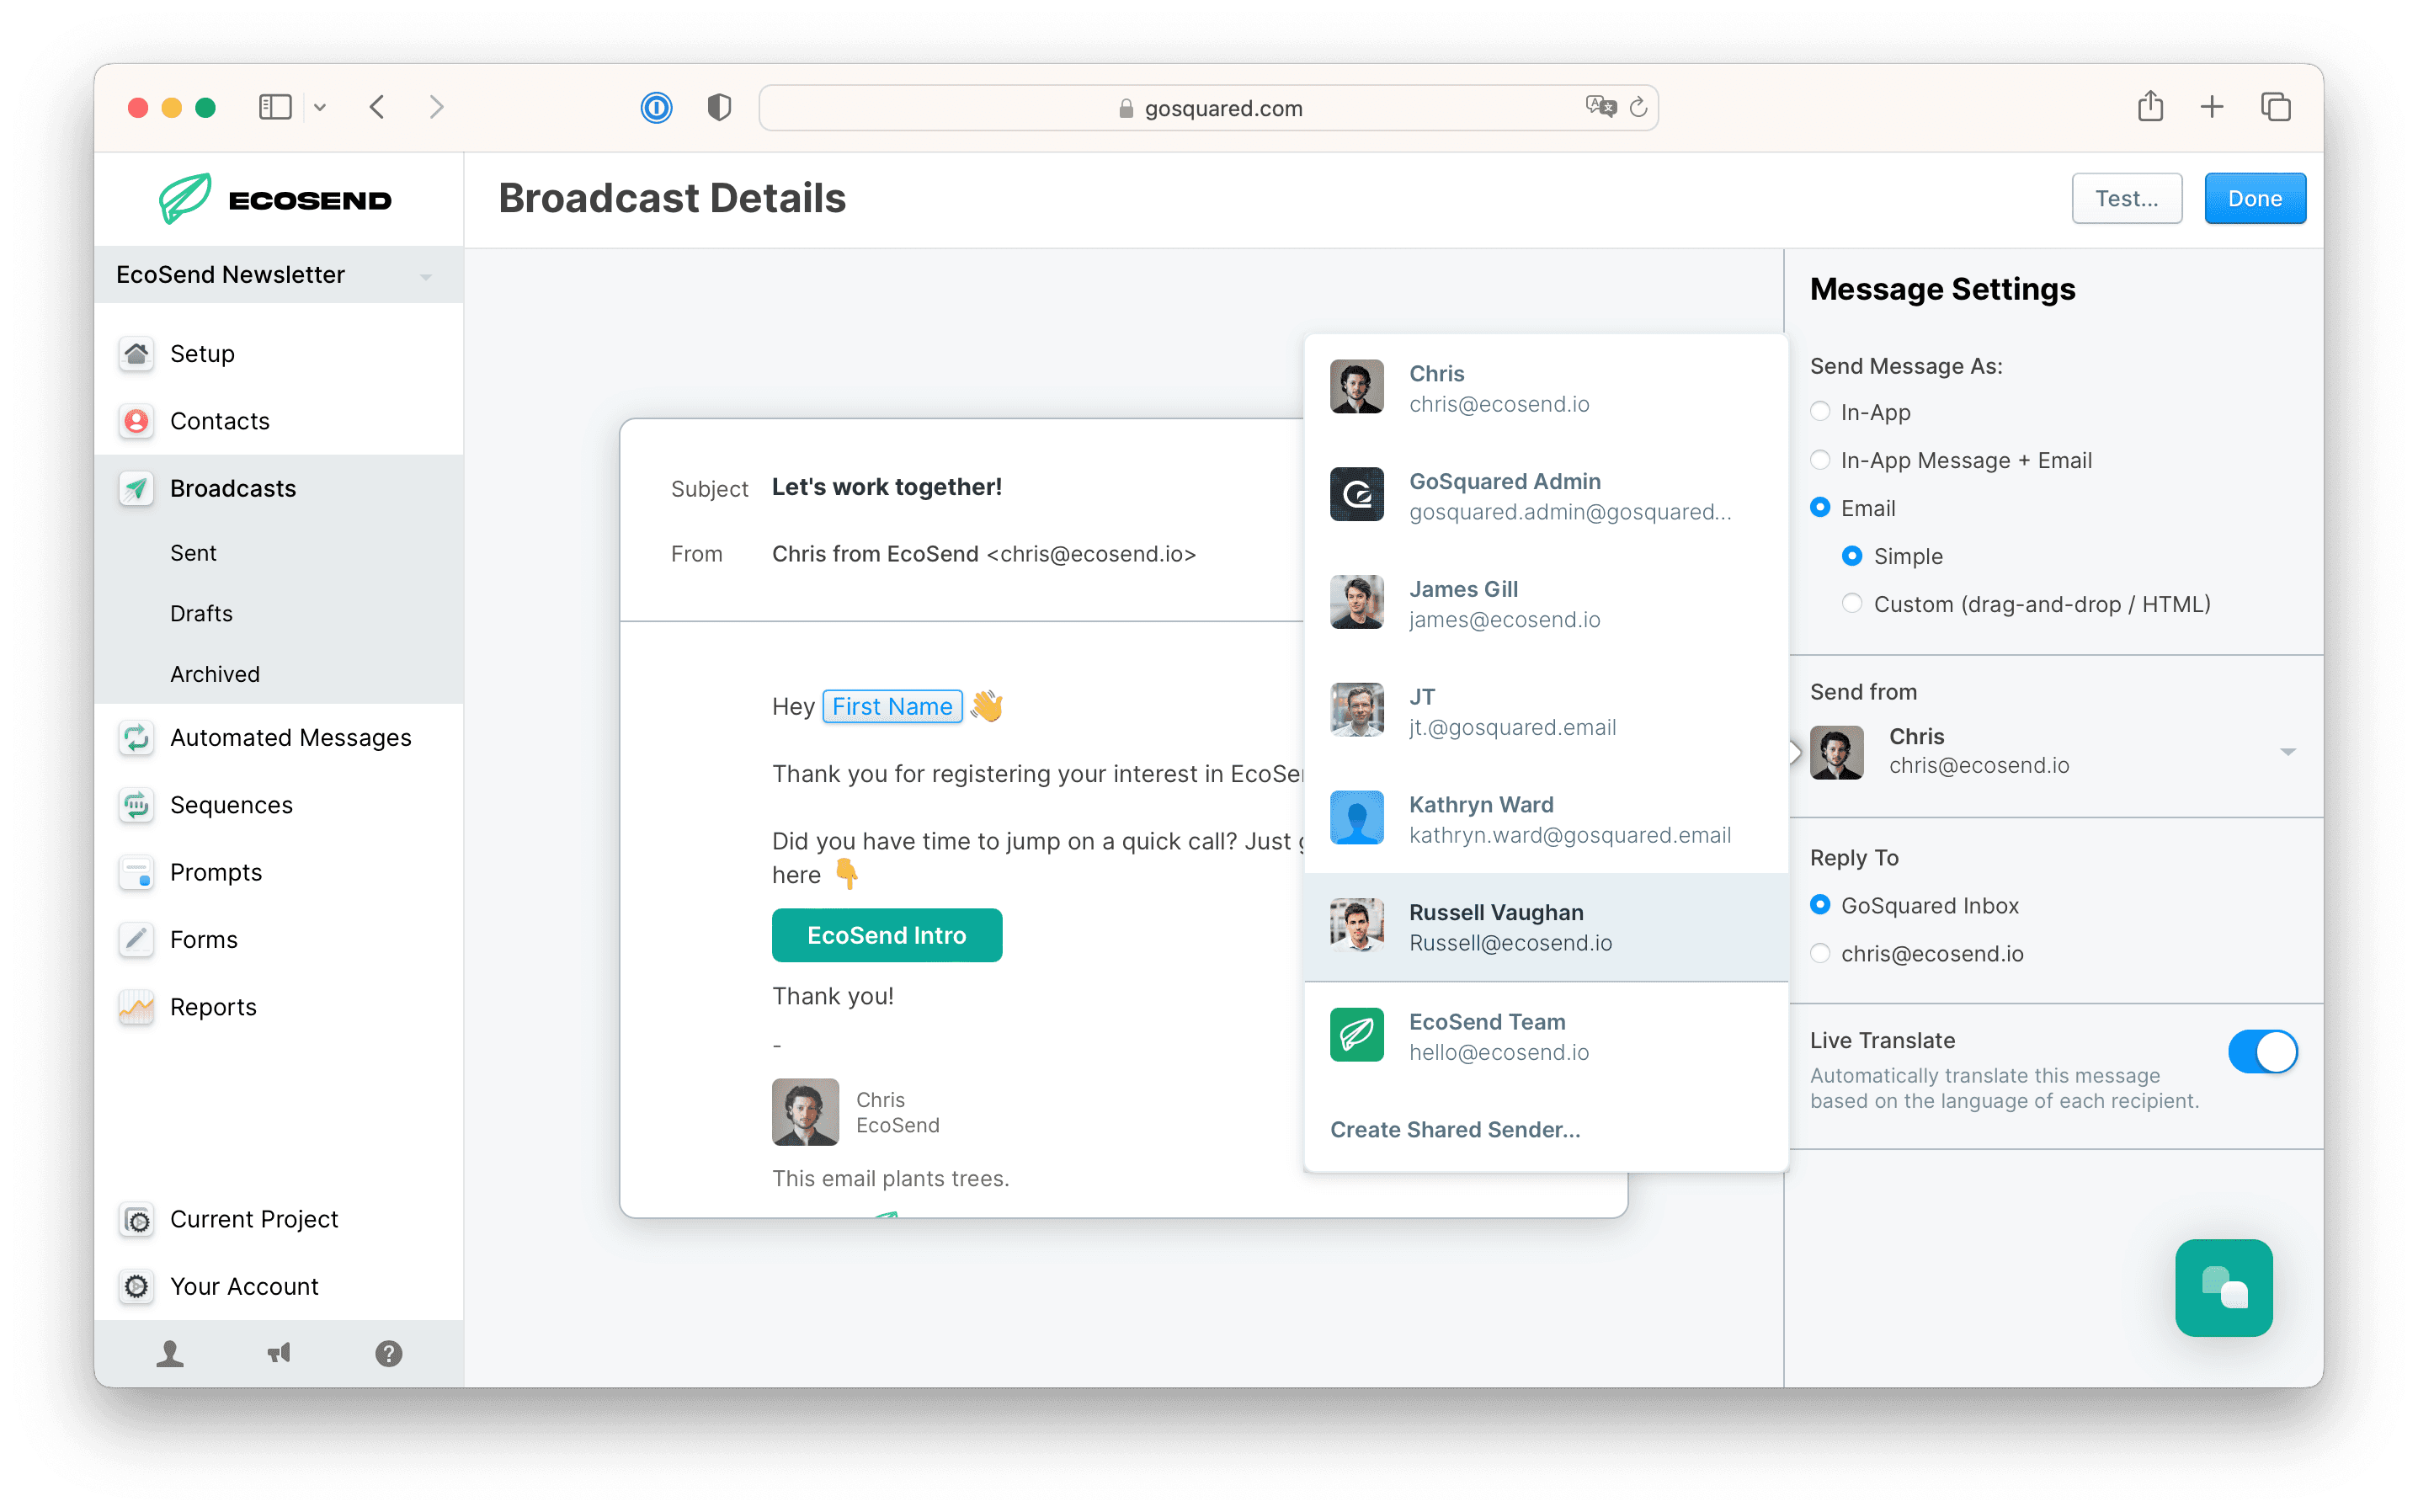
Your preferred Sender Profile, including both personal and shared Sender Profiles, can be selected from the "Send from" menu when you're in the Message Composer.
📺 Video walkthrough
🙋 Common troubleshooting issues
Cloudflare domains
When setting up a Cloudlfare domain, ensure you do not use the “proxied” option in the DNS.
Proxied versions prevent CNAMEs from correctly deploying for the record types we require.
This means that your verification attempt will remain ‘pending’ indefinitely.
GoDaddy domains
When setting up a GoDaddy domain, please ensure to use the record name rather than full hostname.
For example:
✅ gosquared._domainkey
❌ gosquared._domainkey.myexampledomain.com
Namecheap Domains
When setting up a Namecheap domain, please ensure to use the record name rather than full hostname.
For example:
✅ gosquared._domainkey
❌ gosquared._domainkey.myexampledomain.com
Krystal domains
You will need to enter your record name into Krystal’s ‘Name’ field, followed by your GoSquared Value detail into Krystal’s ‘Hostname’ field.
Gandi Domains
Ensure you retain the trailing dot ('.') to your DNS values, otherwise the record will fail.
For example:
✅ DKIM value 12345678.dkim.gosquared-mail.com.
❌ DKIM value 12345678.dkim.gosquared-mail.com
Wix Domains
Ensure you remove the trailing dot ('.') from your DNS values, otherwise the record will fail.
For example:
✅ DKIM value 12345678.dkim.gosquared-mail.com
❌ DKIM value 12345678.dkim.gosquared-mail.com.
Squarespace
Ensure you add your EcoSend 'gosquared._domainkey' record to the Host field, and your EcoSend Value to the Data field.
DMARC Settings
Please read our full documentation here regarding DMARC and other essential Email Authentication protocols.
Compliance check failed
It's rare, but sometimes a domain will not pass the compliance check. While this may sound scary, don't worry. It's most likely an issue on our side that we can assist with, and nothing for you to worry about. Just get in touch with us and we'll be more than happy to assist.
- ✅ Adding your own email domain
- 💻 Editing your DNS records in common domain providers
- ⏳ The DNS verification process
- Setting up the DNS
- DNS verification
- 📤 Update your Sender Profile
- 📺 Video walkthrough
- 🙋 Common troubleshooting issues
- Cloudflare domains
- GoDaddy domains
- Namecheap Domains
- Krystal domains
- Gandi Domains
- Wix Domains
- Squarespace
- DMARC Settings
- Compliance check failed